6. AWS Config Lab Setup
Create a Trail in CloudTrail
-
Open the CloudTrail service console.
-
Click on Trails in the navigation menu on the left.
-
Click on the Create Trail button, to create a trail for this lab.

-
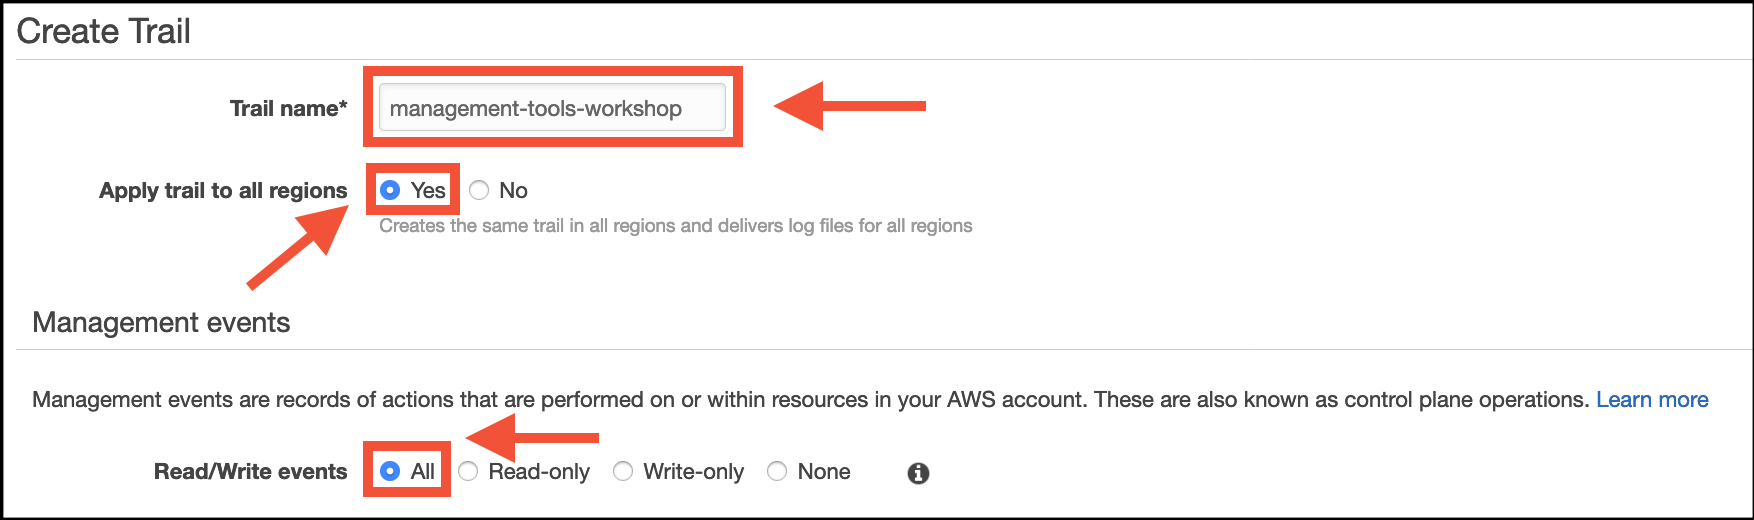
Apply the following settings and create the trail
- Trail name: management-tools-workshop
- Apply trail to all regions: Yes
- Read/Write Events: All
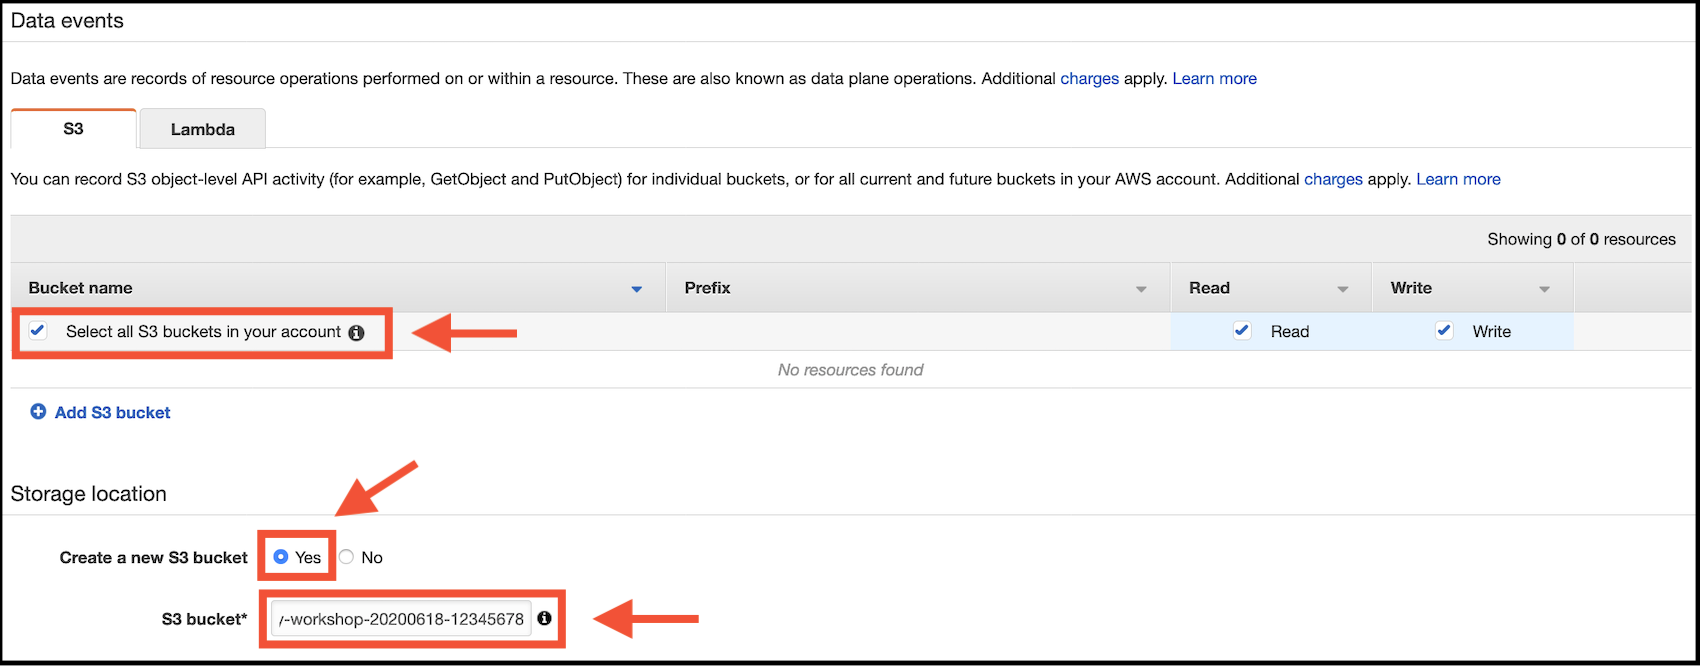
- Data Events:
- Check the box next to Select all S3 Buckets in your account
- Create a new S3 Bucket:Yes
-
S3 bucket: security-workshop-(today’s date)-(yourmobilenumber)- Example: security-workshop-10062020-123456789.
-
Note down your bucket name as you will need it when deploying lab resources later.
-
We are using mobile phone number at the end to ensure that we create a unique bucket per user. For more information on Bucket Restrictions and Limitations click here
- Click on the Create button at the bottom right of the console. You will now see the new trail listed.

- We will now configure the new trail to send logs to CloudWatch to make searching logs easier.
- Click on the trail name.
- Scroll down to the CloudWatch Logs section and click on Configure.

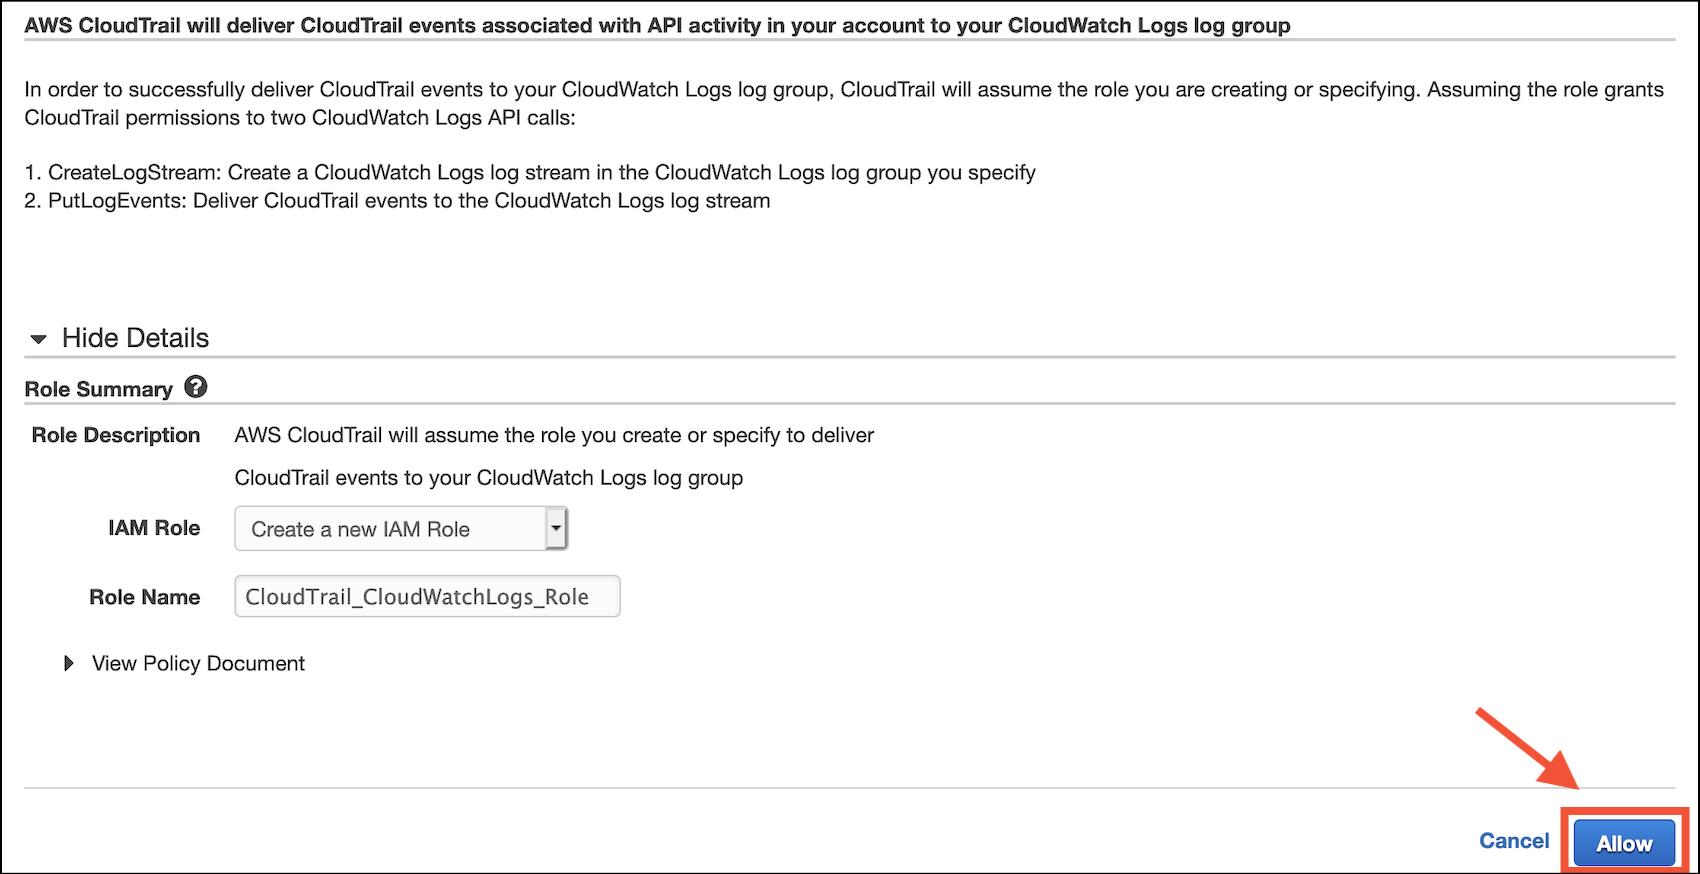
- In the New or existing log group section, type the following name SecurityWorkshop/CloudTrail, then click on the Continue button.

- On the next screen click on the Allow button. This grants CloudTrail the ability to assume a role to write to CloudWatch Logs.
Congratulations! You have now created a CloudTrail trail and added a CloudWatch log for the API activity in your AWS Account.
Turn on AWS Config
AWS Config provides a detailed view of the configuration of AWS resources in your AWS account. This includes how the resources are related to one another and how they were configured in the past so that you can see how the configurations and relationships change over time.
- Open the AWS Config console.
- Click on the Get Started button.
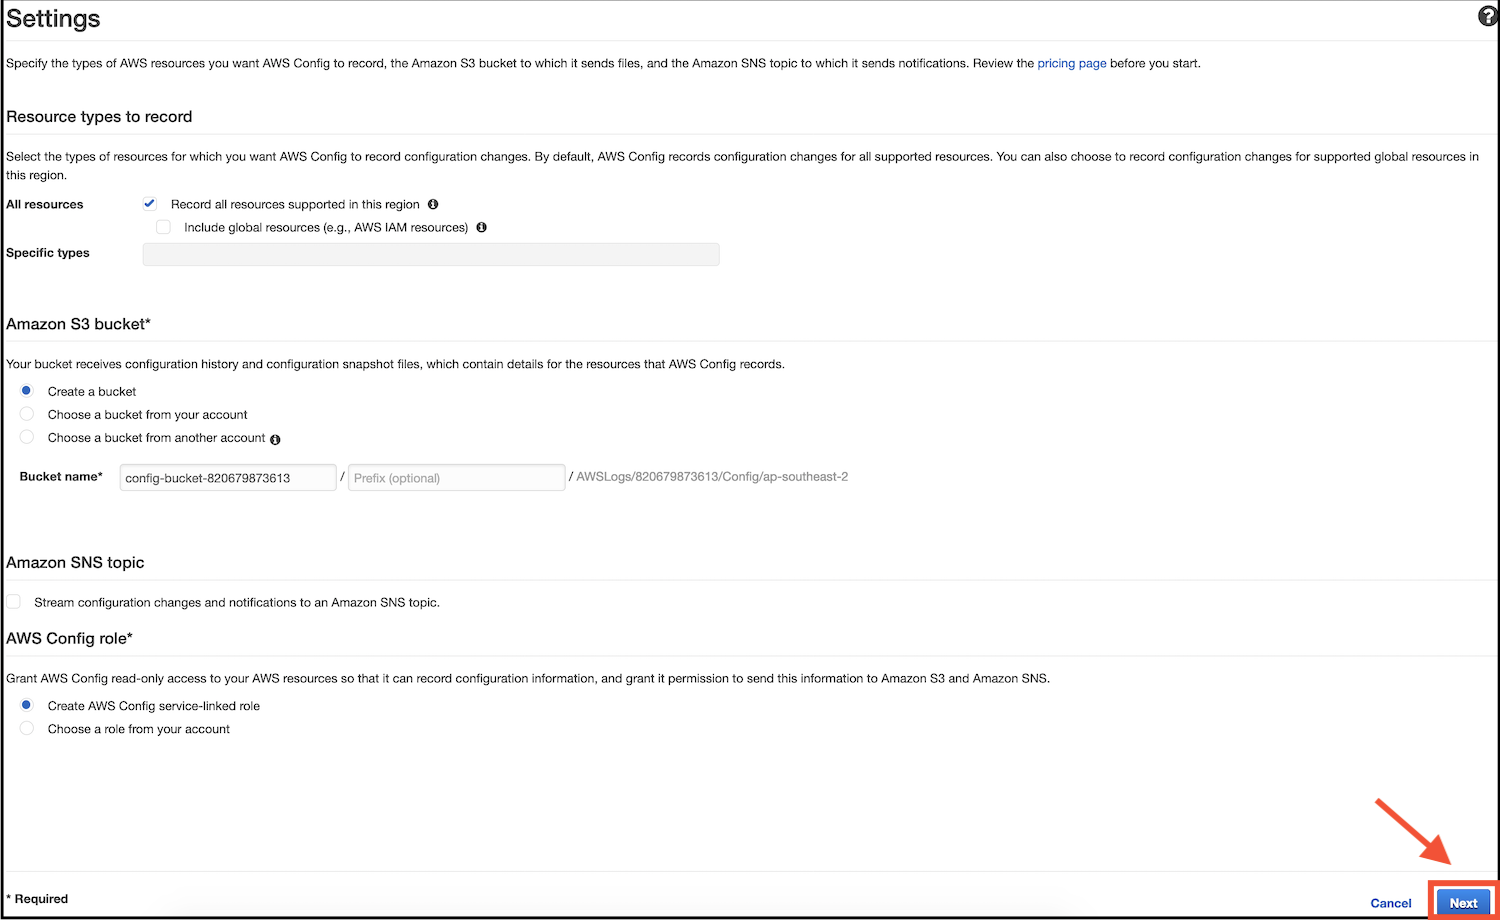
- Leave all settings on their default choices and click on the Next button – This will create an S3 bucket, a role for the Config service, and begin recording configuration history for resources in the account:
- On the AWS Config Rules screen click on the Next button to skip selecting any AWS Config Rules for the moment.
- On the Review screen click on the Confirm button.
Congratulations! AWS Config is now turned on in your account and is tracking configuration history.
Deploy Components for Lab
-
On the Create stack page leave all settings on their defaults and click on the Next button at the bottom right of the console.
-
In the Parameters section:
- for BucketName enter the name of the S3 bucket that you created earlier during the CloudTrail configuration setup. Leave the TopicEmail field as it is.
-
Click on the Next button to continue.
-
On the Configure stack options screen click on the Next button to continue.
-
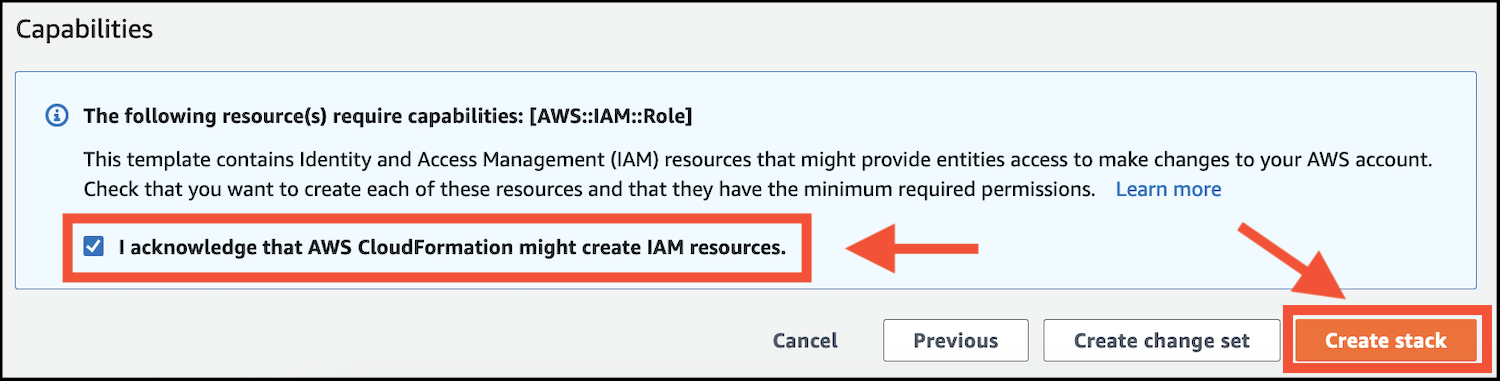
On the Review screen scroll to the bottom. Tick the box next to I acknowledge that AWS CloudFormation might create IAM resources, then click on the Create stack button:
-
Wait for the stack to deploy. This will typically take up to five minutes to complete.
The AWS Config Lab environment has now been created. Please now move on to Part 7 of the lab.
Stuck? Watch this
This video has no audio