1. AWS Systems Manager Lab Setup
Lab Setup
In this part of the lab you will set up the necessary resources in your environment to proceed with the Systems Manager labs.
Create an EC2 Key Pair
-
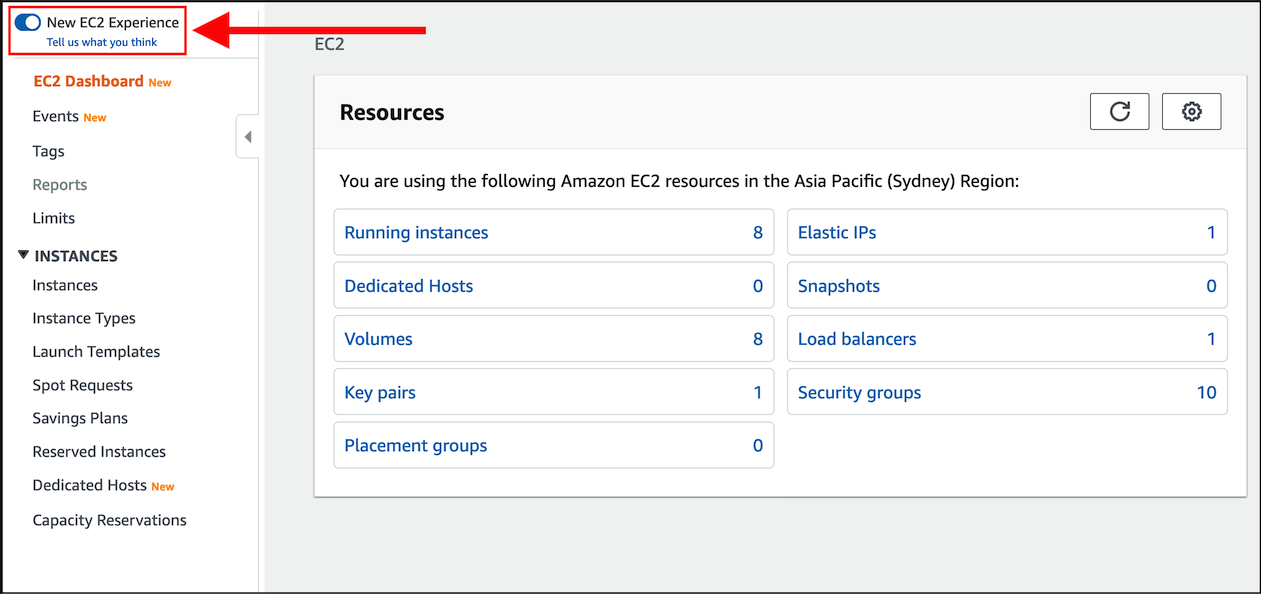
Use your administrator account to access the Amazon EC2 console at https://console.aws.amazon.com/ec2/.
In 2019 the EC2 console was updated to have a consistent look and feel with other AWS Services, and to improve the user experience. This lab guide shows the new and improved console experience. You can enable and disable this new look based on your preferences.
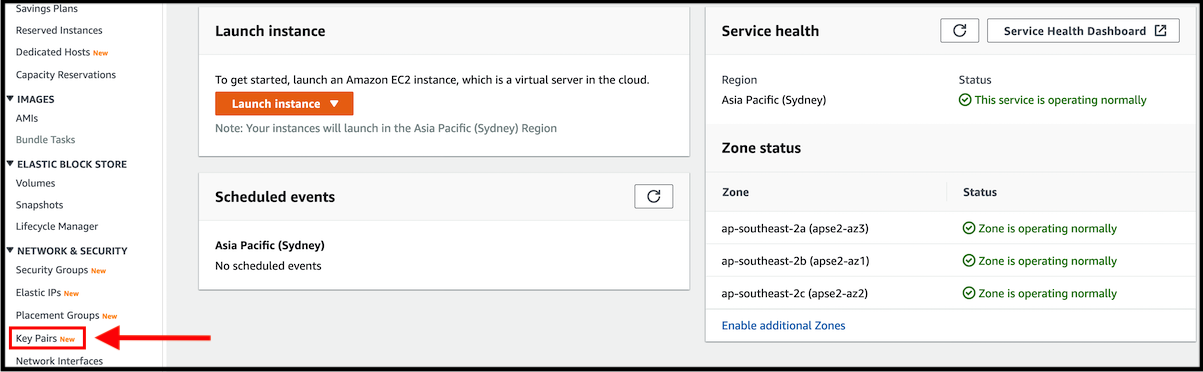
- In the left-hand menu look for the Network & Security section, and click on Key Pairs. Now click on the Create Key Pair button at the top right of the console.
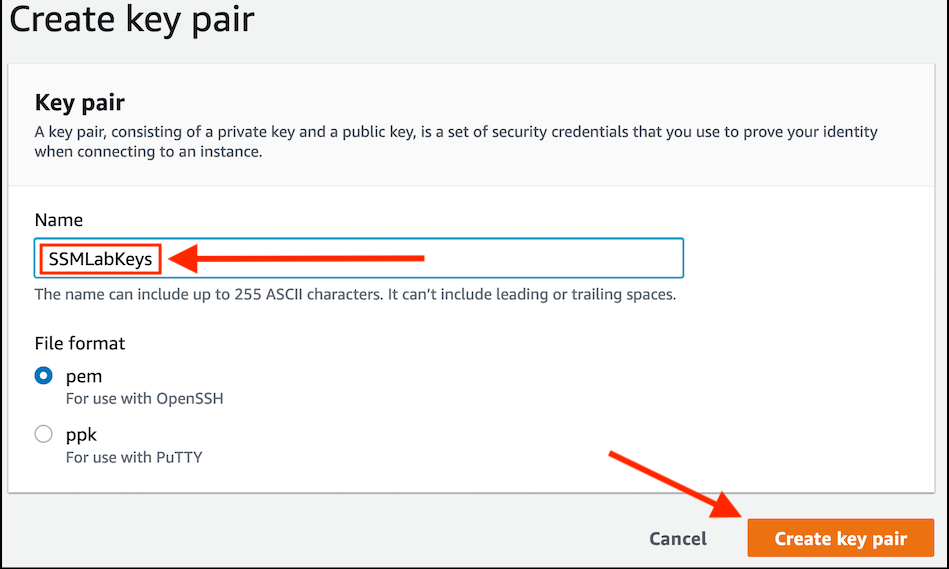
- In the Create Key Pair dialog box, type a Key pair name such as
SSMLabKeys, leave the file format setting on the default of pem and then click on Create key pair.
- Save the
SSMLabKeys.pemfile to your local machine. Note: You will not need the keys for this lab, they are only required for the CloudFormation Stack to deploy successfully (below, in the section: To deploy the lab infrastructure).
KEY CONCEPT: Management Tools - AWS Systems Manager 
AWS Systems Manager is a collection of features that enable IT Operations, some of which we will explore throughout this lab.
There are set up tasks and prerequisites that must be satisfied prior to using Systems Manager to manage your EC2 instances or on-premises systems in hybrid environments.
- Verify that your instances run a supported operating system.
- For EC2 instances, create an IAM instance profile and attach it to your machines.
- For on-premises servers and VMs, create an IAM service role for a hybrid environment.
- Verify that you are allowing HTTPS (port 443) outbound traffic to the Systems Manager endpoints.
- (Recommended) Create a VPC endpoint in Amazon Virtual Private Cloud to use with Systems Manager.
- On on-premises servers, VMs, and EC2 instances created from AMIs that are not supplied by AWS, install a Transport Layer Security (TLS) certificate.
- For on-premises servers and VMs, register the machines with Systems Manager through the managed instance activation process.
- Install or verify installation of SSM Agent on each of your managed instances.
SSM Agent is installed by default on (base Amazon-managed AMIs):
- Windows Server 2008-2012 R2 AMIs published in November 2016 or later
- Windows Server 2016 and 2019
- Amazon Linux
- Amazon Linux 2
- Ubuntu Server 16.04
- Ubuntu Server 18.04
- Amazon ECS-Optimized
Setting up Systems Manager
- Use your account to access the Systems Manager console.
- Choose Managed Instances from the navigation menu on the left. If you have satisfied the prerequisites for Systems Manager, you will arrive at the AWS Systems Manager Managed Instances page.
- As a user with AdministratorAccess permissions, you already have User Access to Systems Manager.
- The Amazon Linux AMIs used to create the instances for this lab are dated 2017.09. They are supported operating systems and have the SSM Agent installed by default.
AWS Systems Manager now offers a Quick Setup method to simplify configuring your instances to be managed.
-
Click on the Quick Setup link at the top of the navigation menu on the left.
-
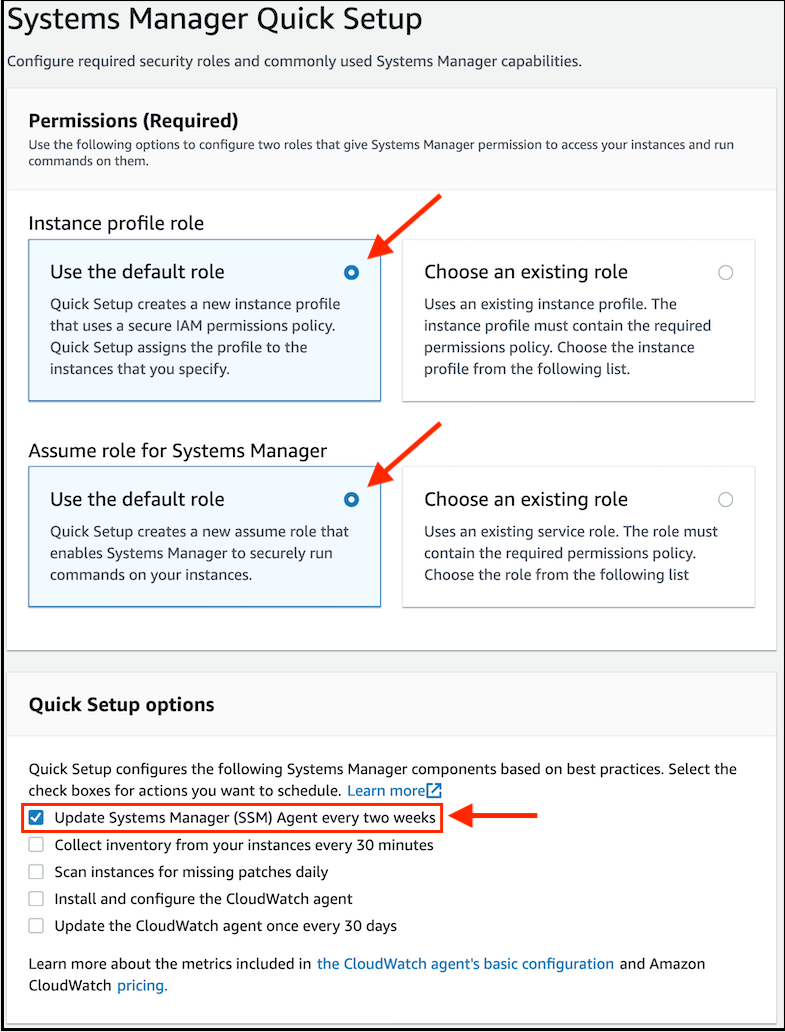
Review the Permissions (Required) section. Note that there is a default role, and you can also specify your own role for more granular permissions.
-
Keep the selections Instance Profile role and Assume role for Systems Manager on the Use the default role selections.
-
Review the Quick Setup options section
-
Ensure that the Update Systems Manager (SSM) Agent every two weeks option is checked. Leave all other options unchecked.
-
-
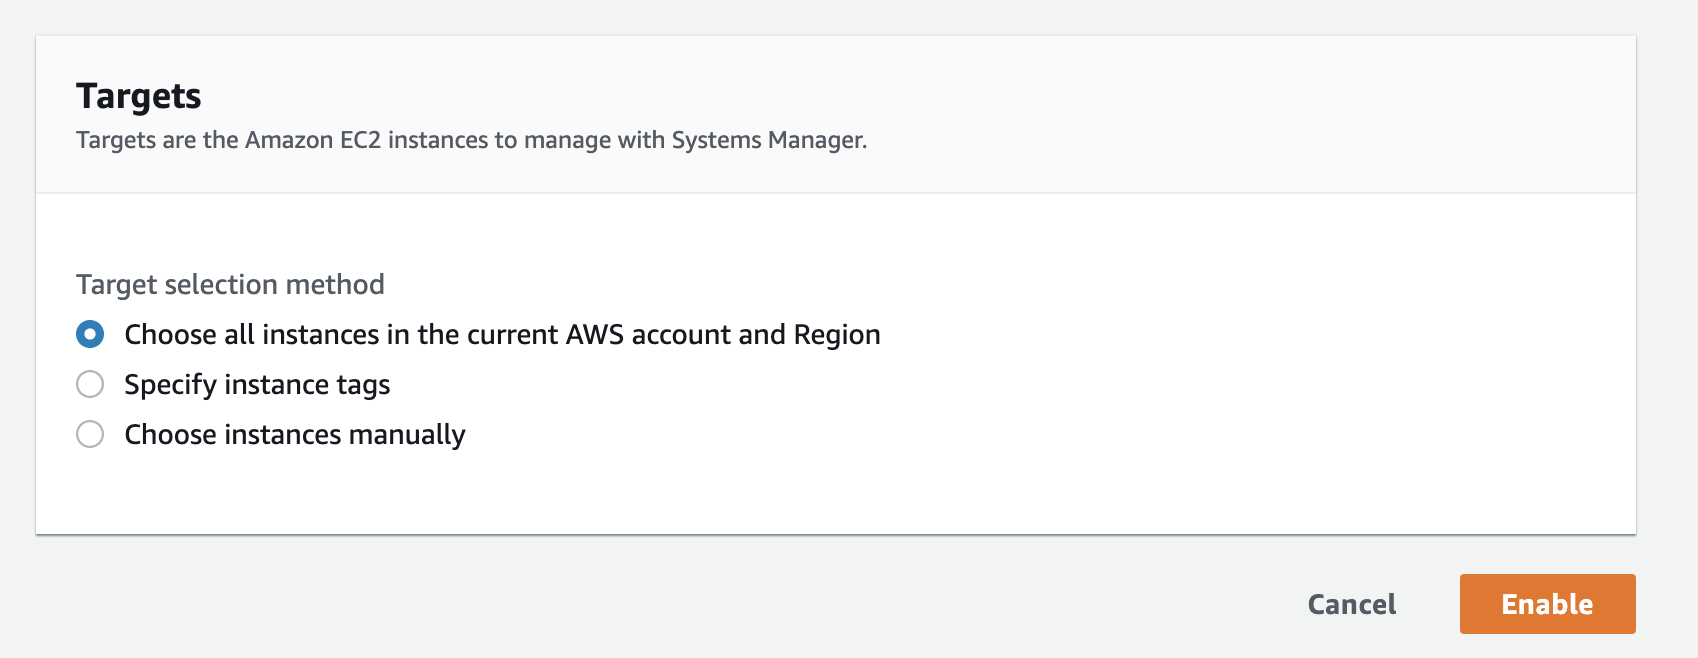
In the Targets section, define targets for systems manager setup:
- Under Target selection method, select Choose all instances in the current AWS account and region
-
Select the Enable button.
To deploy the lab infrastructure:
- Deploy the infrastructure with CloudFormation -
Click here To Deploy Lab into your Account
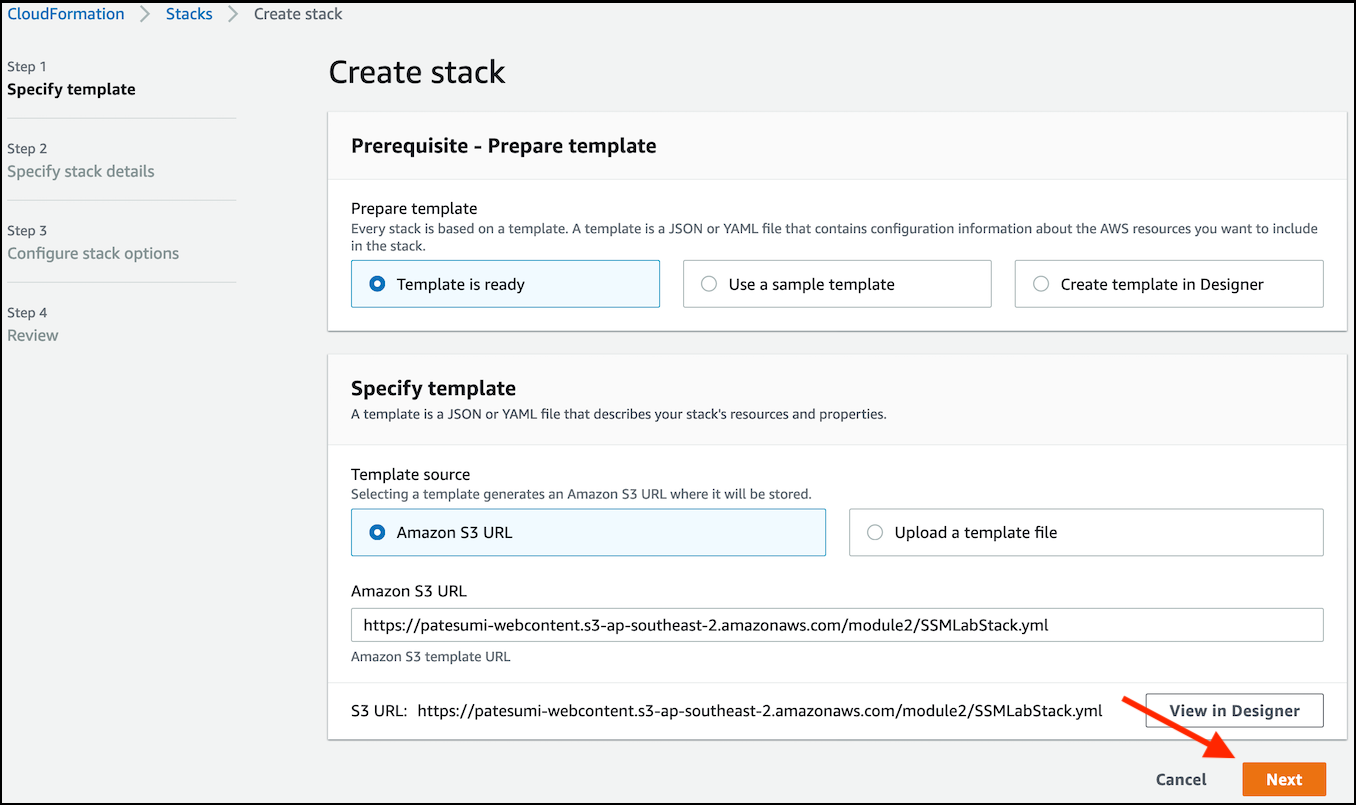
- On the Create Stack page, leave all settings on their defaults and click on Next.
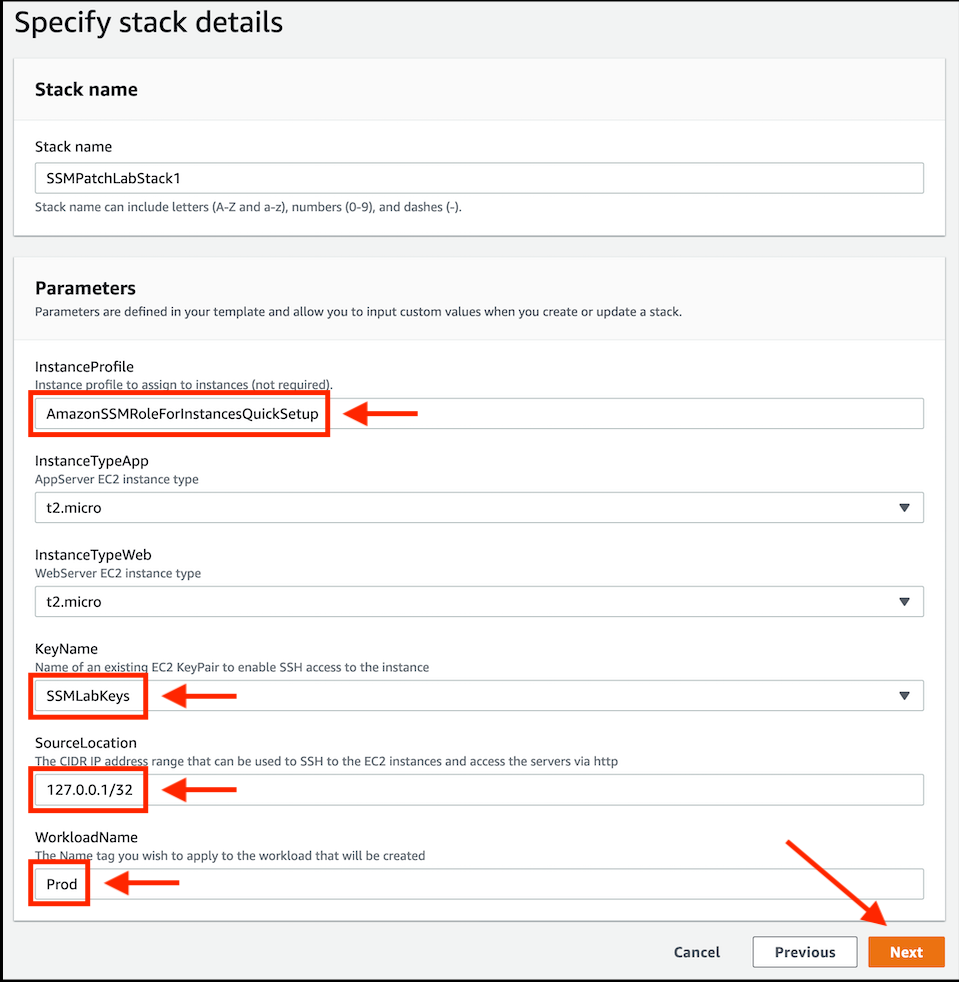
- In the Specify stack details section, accept the predefined stack name
SSMPatchLabStack1. - In the Parameters section:
- Specify the InstanceProfile as
AmazonSSMRoleForInstancesQuickSetup. MAKE SURE TO ENTER THIS EXACTLY AS WRITTEN OR THE STACK WILL NOT DEPLOY! - Leave InstanceTypeApp and InstanceTypeWeb as the default free-tier-eligible t2.micro value.
- Select the EC2 KeyName you defined earlier from the list (SSMLabKeys).
- Enter the loop-back IP address
127.0.0.1/32in SourceLocation.
- Enter the loop-back IP address
- Define the Workload Name as
Prod. - Click on Next.
- Specify the InstanceProfile as
- On the Configure stack options page under Tags, type Owner in the Key field, and enter your name in the Value field.
- Leave all other sections unmodified. Scroll to the bottom of the page and click on Next.

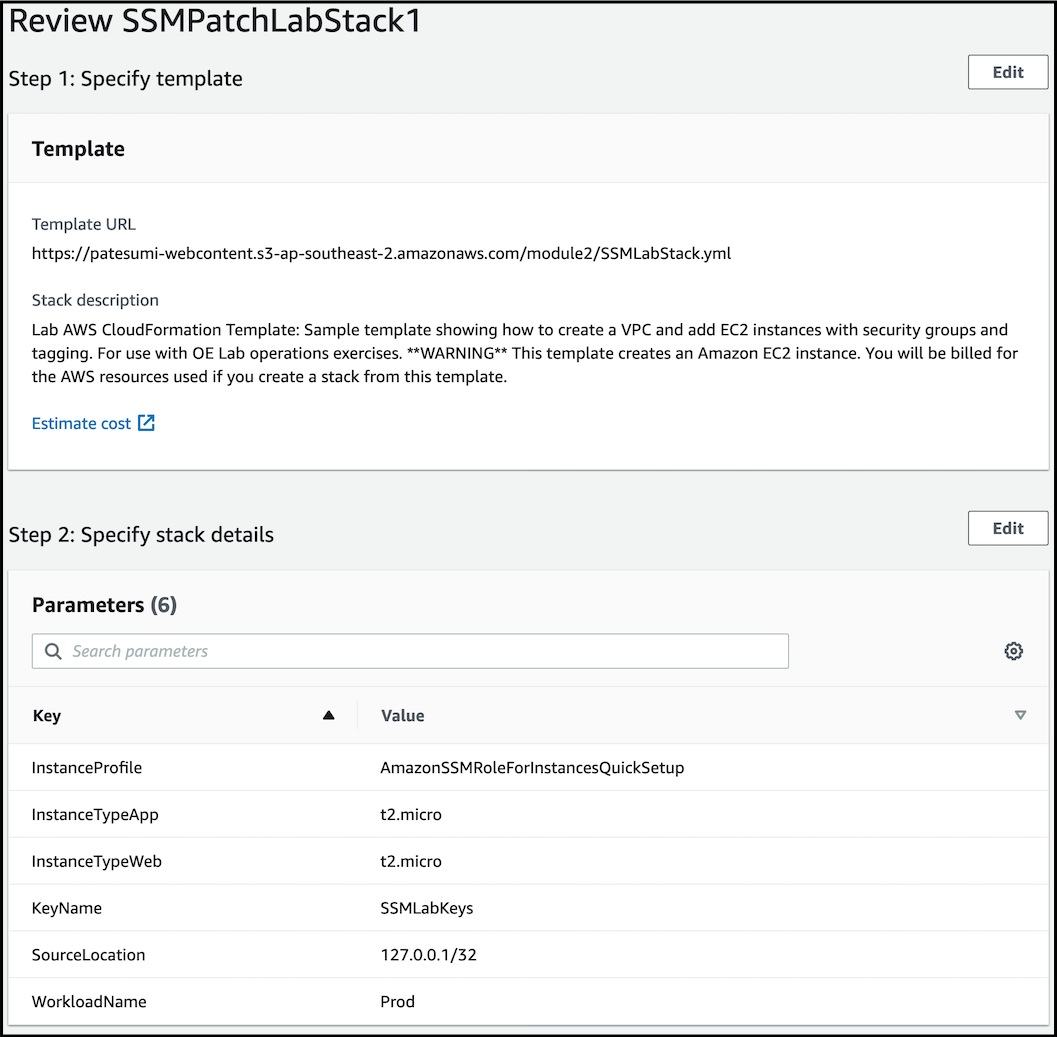
- On the Review page, review your choices and then scroll down and click on Create stack.

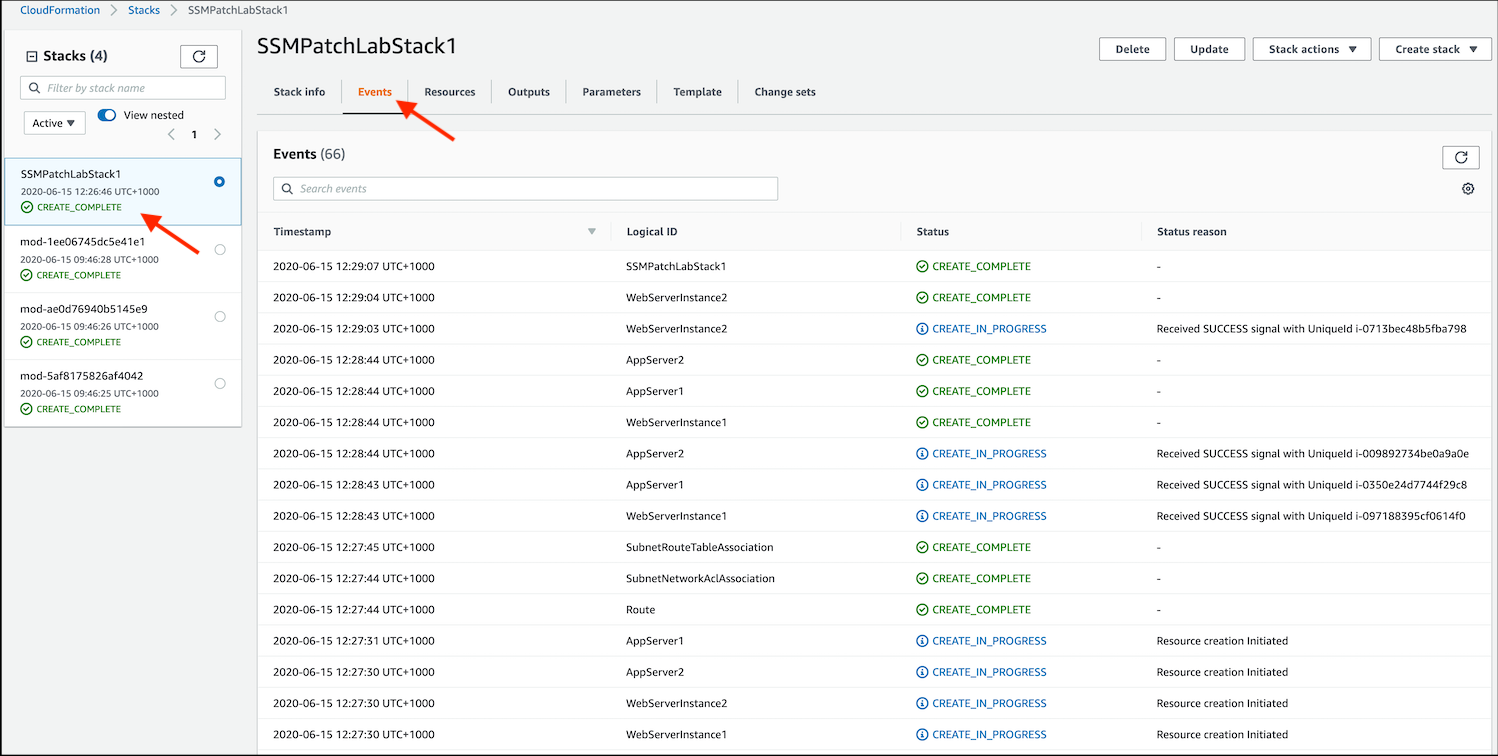
- On the CloudFormation console page your stack deployment will now begin.
- Choose the Events tab for your selected workload to see the activity log from the creation of your CloudFormation stack. Deployment will take about five minutes.

Check Deployed Instances
When the Status of your stack displays CREATE_COMPLETE in the filter list, you will have created a representation of a typical ‘lift and shift’ 2-tier application migrated to the cloud.
- Navigate to the EC2 console to view the deployed systems. Click on Instances in the left-hand menu. The four instances created for this lab will be prefixed with ‘Prod-’ in the Name column.
Stuck? Watch this
This video has no audio